
Introduction
Table of Contents
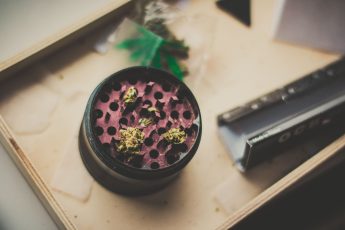
A grinder is one of the essential tools that any weed smoker has, but it is a known fact that grinders become caked with debris and residue. It develops plenty of grime and can be a place for mold and mildew to thrive. That will likely happen if you don’t maintain it well, and the longer you leave your grinder to stay dirty, the worst it will be to clean down the road. That is why you must clean your grinder regularly and take care of it. The good news is that cleaning the grinder is not a difficult thing to do at all.
Let’s now talk about how you can keep your grinder clean, so you can use it with ease and not have to worry about it with too much debris creating a haven for mold and mildew to develop. Let’s go over the tools you need to clean your grinder first.
What Tools Do You Need To Clean Your Grinder?
All you require is a few household products to clean your grinder. You probably have some of the products necessary, but the items you need are cotton swabs, an old toothbrush (or a new one but you can only use it for cleaning your grinder instead of brushing your teeth), rags, a rolling tray, a cup or a small bowl, and rubbing alcohol. If you don’t have some of these items, then you can always go to your local supermarket, drugstore, or box store to get them. However, you must have all of these items so you can clean your grinder effectively.
The First Step Is To Disassemble The Grinder
If you have a basic grinder, it only consists of two-toothed halves, whereas the more advanced ones have multiple areas for storage. Regardless of what type of grinder you have, you will want to take it apart or not clean it effectively. If you attempted to clean your grinder without disassembling it first, then you did not give it a good and effective cleaning. As a result, there is a good chance of having mold, which is unsafe to use. Take apart your grinder because it will be the only way to clean it the way you need.
Begin Cleaning With The Toothbrush
The first thing to do is to begin cleaning your grinder with that toothbrush. If you have a spare toothbrush that you did not use from your dentist’s office, you can use it for your grinder. However, if you do have an old toothbrush that you stopped using that you still have stashed away, you can use that as well. You can clean it with soap and water first and then use it to start scrubbing the grinder’s surface to remove any pollen, debris, and dirt. If your grinder consists of a screen, ensure that you do not damage it as you clean. Be gentle with how you scrub your grinder, or else you can damage it.
The Next Step Is To Use Alcohol In The Cleaning Process
Take your small bowl and pour some rubbing alcohol into it. You will need to brush your grinder again with the toothbrush, but this time, you will dip it into the alcohol to disinfect the grinder. The area of focus is to clean the grinder’s teeth, where bacteria and mold can build up from the dirt. Ensure that you brush the corners and edges because that is where the buildup of caked debris is. If you find some of the areas of the grinder challenging to clean and reach with the toothbrush, that is where the cotton swabs come in, as you will want to use them to clean the crooks and nannies of the grinder.
Dip the cotton swab into alcohol and then clean those areas of the grinder as well as the grinder’s exterior. You will polish it that way so it remains clean for a while. The critical thing to remember is that rubbing alcohol comes in different strengths, and the stronger it is, the better it is to clean and sterilize your grinder.
Use Warm Water To Clean It After Using The Alcohol
After cleaning the grinder with the toothbrush and the rubbing alcohol, the next step is to rewash it with warm water. You want to remove the alcohol from the grinder’s pieces. That means you will want to put the pieces on the rolling tray and go to your sink, whether it is in the kitchen, bathroom, or laundry room. Begin by taking each part and washing them with warm water for one to two minutes apiece. You do not want to have any trace of the rubbing alcohol on your grinder as it can erode it if left on for too long.
The Final Step Before Reassembling Is To Dry The Grinder Well
After washing, it is essential to dry the grinder well so you can take a rag and begin to dry off each piece. Dry it as well as you can, and you must do, or else if parts of the grinder remain damp, you are risking the creation of a breeding ground for bacteria, mold, and mildew. You can also use cotton swabs to dry it, or if you want to use it quickly, you will want to use a hairdryer to dry it well.
However, if you are not in a hurry, allow the pieces to dry in the open air after using a rag. If you can wait a day to use your grinder again, wait for a day to use it. The last thing you want to do is allow your weed to get wet, which will ruin the experience! However, if you have a clean grinder and you are not having a good experience with it, then there is a chance that it needs replacing.
How Do You Know That Your Grinder Needs A Replacement?
Sometimes the grinder needs to go into the trash if you are not getting the best experience from it anymore, regardless of its cleanliness. You will know when to replace it by seeing that the magnets no longer hold the pieces together or metal shavings in the grinder. You may know it is time to toss away the grinder if you have damaged or lost rubber O-rings or if there are damaged or missing teeth or screens. However, the good news is that if you are looking for a new grinder, there are plenty of options.
Recent advancements or alternative methods in grinder cleaning can be considered, such as:
- Eco-Friendly Cleaning Solutions: Exploring natural or less abrasive alternatives to rubbing alcohol.
- Ultrasonic Cleaners: Investigating the effectiveness of ultrasonic technology for deep cleaning without physical scrubbing.
- Preventative Maintenance Tips: Offering advice on regular maintenance to reduce the need for deep cleaning.
- Material-Specific Care: Tailoring cleaning methods to different grinder materials (metal, plastic, wood).
- Innovative Cleaning Tools: New tools or brushes specifically designed for grinder cleaning.
- Health and Safety Tips: Guidance on ensuring cleanliness to prevent health risks.
Conclusion
The one thing that many cannabis users may forget to do is to clean their grinder. That can create plenty of problems such as mold, mildew, and bacteria growing from the caked debris in the grinder. It is essential to clean it at least once a week to avoid getting to that point. It takes some work to do, but you want to care for your weed apparatus the best you can. If you clean it well and are diligent about it, you will find it will last you a long time. Look for signs that indicate that your grinder is ready for retirement so you can replace it with a good-quality new grinder.